How It Started: Fixing a Twisted Clamshell and Broken Pushrod
The Tension Warning
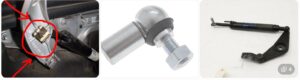 The difficulty in removing that bolt revealed a larger issue: the clamshell was under mechanical stress. I asked my son to hold the clamshell while I removed the last of the broken bolt to prevent it from slamming down. Sure enough, as soon as the connection released, the clamshell moved forcefully. Thankfully, we kept our hands and bodies clear of the mechanism, and the top pushrod freed itself without damaging the fabric.
What I Wish I Had Known Before Starting
Looking back, there is one thing I wish I had understood before starting the repair.
The Clamshell Support Strut is simply a rigid mechanical link. It is not a shock absorber, damper, hydraulic piston, or pressurized gas strut. More importantly, I later learned that the transmission cables can be disconnected from the transmission motors and that, once disconnected, the transmissions do not spin on their own.
If I had known this from the beginning, I would have taken a completely different approach.
I would have:
- Disconnected both transmission cables from the motors.
- Used a drill to manually position and adjust the transmission to relieve the mechanical tension on the clamshell (get it even),
- Then proceeded with the troubleshooting and repair with the mechanism in a much safer and more controlled state.
Instead, I was initially dealing with a clamshell that was under tension, a jammed pushrod, and very limited working space. That made removing the pushrod bolt much more difficult than it needed to be.
This is probably the most important lesson from my experience: before working on the clamshell mechanism, understand how to isolate the transmissions and relieve the tension first. It can make the entire repair significantly easier and safer.
The Deeper Problem: Alignment vs. Synchronization
-
Are the two convertible-top transmissions actually synchronized to their true mechanical Position 0?
-
If they are synchronized, is the remaining unevenness caused by physical twist in the clamshell itself?
Important: This is my documentation of the process I used on my car. It is not intended to replace the official Porsche service manual or professional repair guidance. Keep your hands clear of the clamshell at all times.
Key Components
| Component | Function | Notes |
| Boomerang Arm | Drives both the clamshell and convertible top frame. | Attached to the transmission output shaft via a 19mm bolt (often secured with Loctite). |
| Clamshell Support Strut | Rigid mechanical link that controls the clamshell’s movement. | It is not a damper, shock absorber, hydraulic piston, or pressurized gas strut. It is simply a rigid metal bar that connects to the clamshell via a retaining clip and pin and to the Boomerang Arm via a tight ball joint. Disconnect it at the upper retaining clip and pin rather than attempting to pry apart the ball joint. |
| Top Pushrod | Connects the soft top frame to the Boomerang Arm. | Secured with a T40 Torx shoulder bolt. |
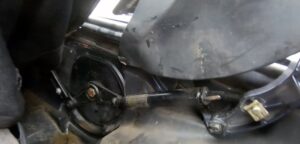
After watching several YouTube videos, reading through discussions on different forums, and reviewing the Porsche service manual, I was able to piece together the proper approach to the problem. The procedure below documents the approach I ultimately used, incorporating the relevant procedures and mechanical references described in the Porsche service documentation.
The Alignment Procedure

Sami Joueidi holds a Master’s degree in Electrical Engineering and brings over 15 years of experience leading AI-driven transformations across startups and enterprises. A seasoned technology leader, Sami has led customer adoption programs, cross-functional engineering teams, and go-to-market strategies that deliver real business impact.
He’s passionate about turning complex ideas into practical solutions, and about helping teams bridge the gap between innovation and execution. Whether architecting scalable systems or demystifying AI concepts, Sami brings a blend of strategic thinking and hands-on problem-solving to every challenge. © Sami Joueidi and www.cafesami.com, 2025. Feel free to share excerpts with proper credit and a link back to the original post.